Repair of Snapped No.1 Exhaust Manifold Stud *DONT DELETE*
Posted: Thu Jun 03, 2010 3:40 pm
No.1 Exhaust Manifold Stud Repair
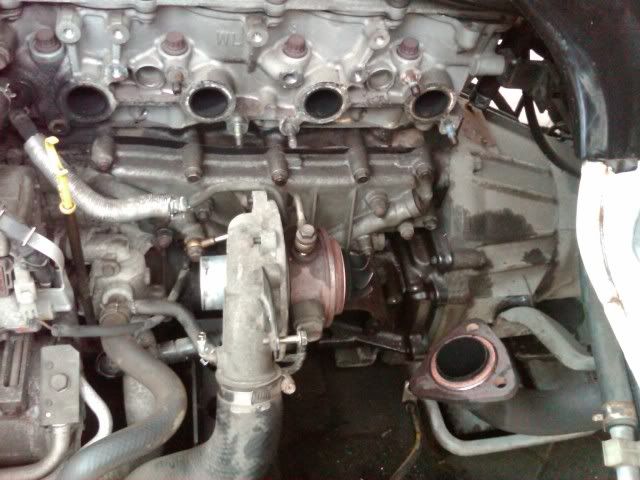
Broken No.1 stud ( the one just outside the turbo heat shield, nearest the alternator)
Symptoms:
.Black Sooty deposits around the Bleed hose pipe and round front passenger side of head.
.Strange Whistle sounds in time with engine revs, usually mistaken for loose drive belts
.Smell of Exhaust fumes in Cabin
.Nut Missing
Tools Required:
A very well stocked Socket Set
6 sided sockets
Exhaust Assembly Paste
Light Emery Cloths
Penetrating Oil (WD40 etc)
3mm Good Quality Tungsten Carbide drill bit or Similar.
Assorted Drills up to 6.8mm
8mm Tapered Tap and Wrench
Cloths
Suitable Aerosol Can Lid
Parts Required:
Exhaust Manifold Gasket mazda part no. MWL0113460 -approx £20+ Vat
6 Nuts (Hot Side) mazda Part No. M9YB100801 – approx £3.34+ Vat each
Mazda Hot Side Studs were approx £4.50+ Vat each. We fit Landrover V8 Metric 8mm Studs Part no. TE108051L £0.39+ Vat each (Cannot Guarantee, but it has done 500 mile no issues)
Repair:
Remove ALL BATTERY CONNECTIONS,
Remove Heat Shield,
Remove flexible U rubber pipe (Air Inlet to Turbo),
Remove large diameter solid plastic pipe that heads towards the rear of the engine to air filter,
Remove Hatch at the rear of the engine to gain access to the EGR Valve area,
Remove large diameter plastic pipe across back of head, towards Air Filter. Watch the connection with the Rocker Cover Breather and Vacuum pipe,
At this point it is advisable to crack the joint of the Exhaust Manifold to EGR 22mm metal pipe as this can be a pig to undo. Leave for a while pre-soaked with WD40 or similar. We had to use 24inch Stiltsons to remove. It was tight,
Losen this joint, but it cannot be removed until the EGR end of this pipe is unbolted (watch the little Tin Gasket at the EGR end),
Unbolt the Exhaust (watch the ring gasket. It can be reused if cleaned out and refilled with exhaust jointing paste) and the Exhaust to Engine Mounting,
Remove Turbo to Exhaust Casting and Bracket to Body,
Undo Turbo Mounting Bolts (3 go on way 1 goes the other, watch the Tin Gaskets. These can be reused if cleaned up and look ok),
Loosen Oil Fed Pipe, but leave connected to keep dirt out (watch the copper washer),
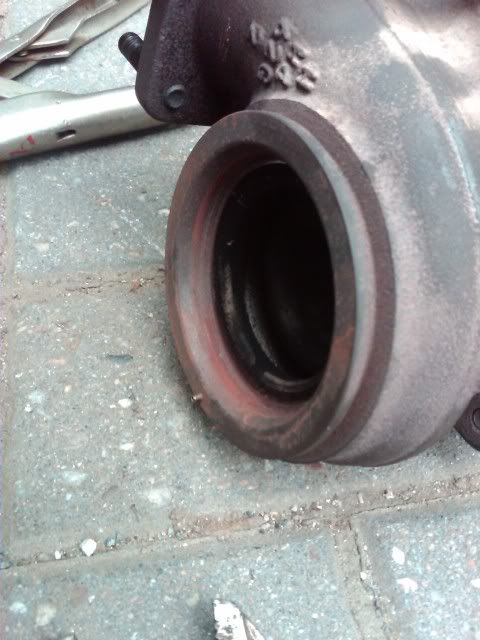
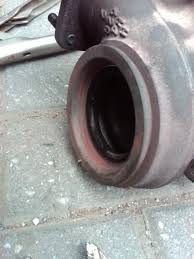
Undo the Turbo Clamp that holds the two halves of the Turbo together. The rear end of the Turbo can then come away with the manifold without breaking into the cooling system as there is enough flex on these pipes to move things around,
Cover inlet of Turbo to stop Swarf or Dirt getting into turbo (Use and Aerosol Can Lid. Cheers Kirsty),
Unbolt remaining Manifold Nuts,
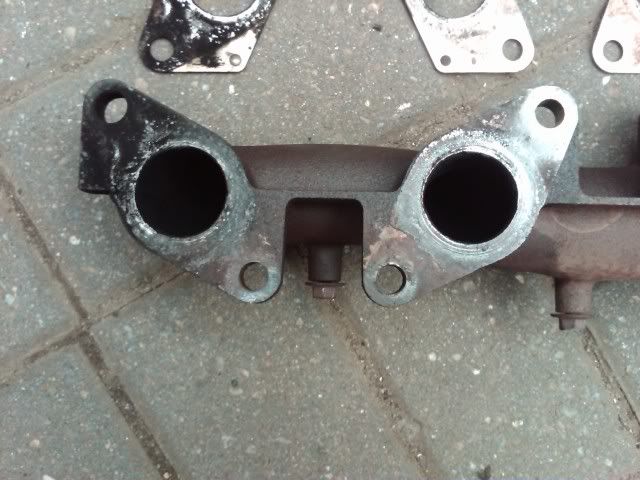
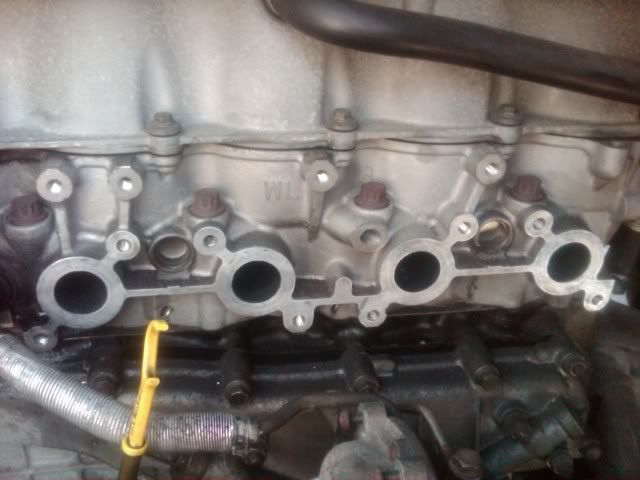
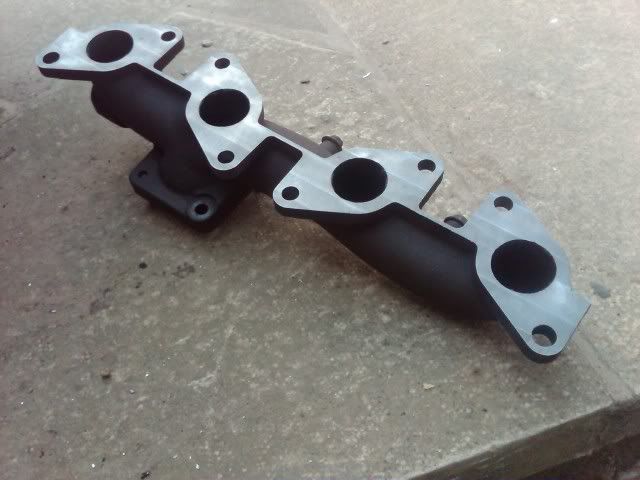
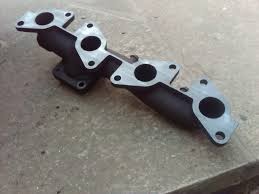
Remove Manifold from Head,
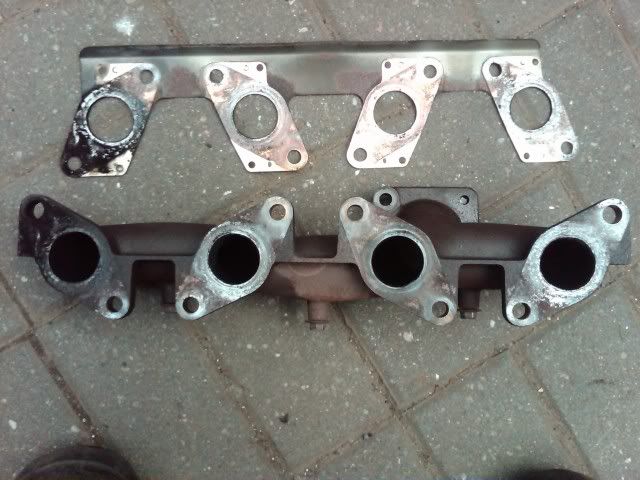
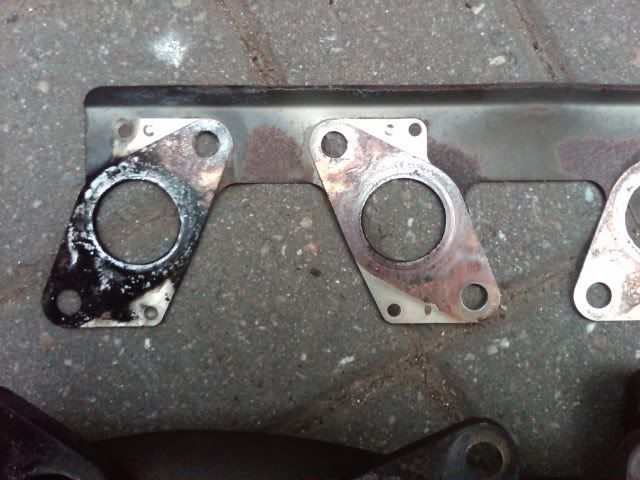
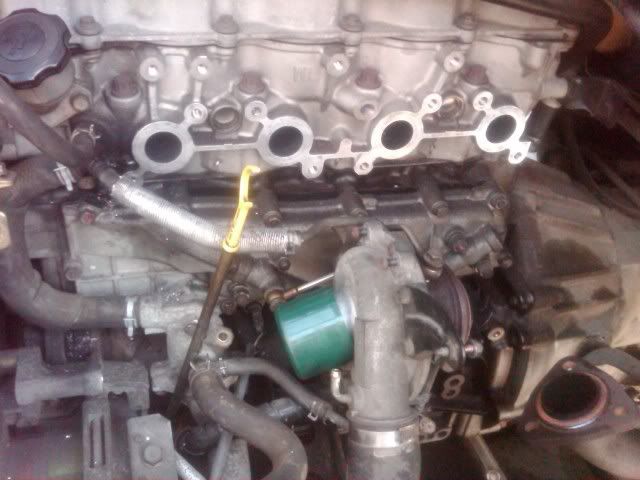
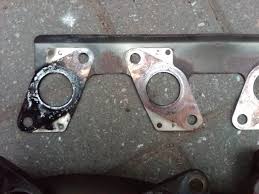
Examine Gasket, Examine Manifold and Examine Head,
Remove all Studs and Examine carefully, (no.8 on mine was also found to be suspect see pics of gasket and studs later),
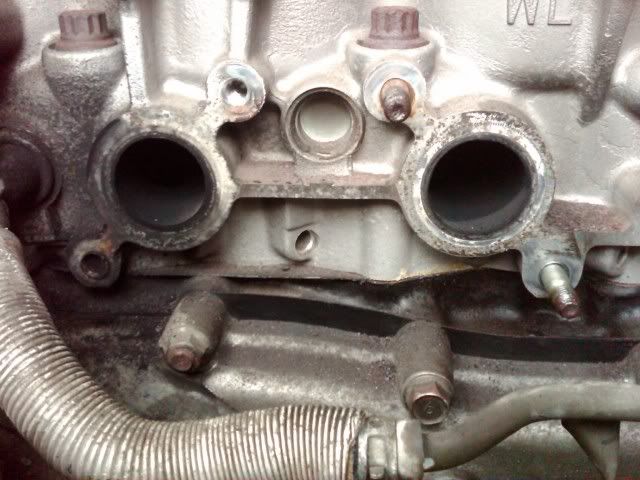
Clean up Cylinder Head,
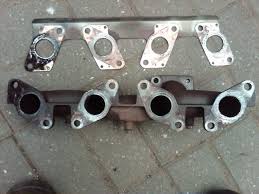
Remove Alternator from mounting. No need to remove wiring as it will move out of the way,
Put manifold on the flattest surface you can find. Shine a light under the Manifold to see if you can see the light at any point. You may find that each end (Studs 1 an 8 ) are raised. (Mine needed 2mm out of the middle area to get right by skimming.) See pics later. Head Skimmed at R.M Parker, Precision Engineering, Special one off Tooling, Unit 2, Riverside Mill, Greenfield Road, Colne, Lancashire, BB8 9PE. Tel: 01282 870230 approx £50.00 (depends if he likes you :@))
Now the Tricky Bit
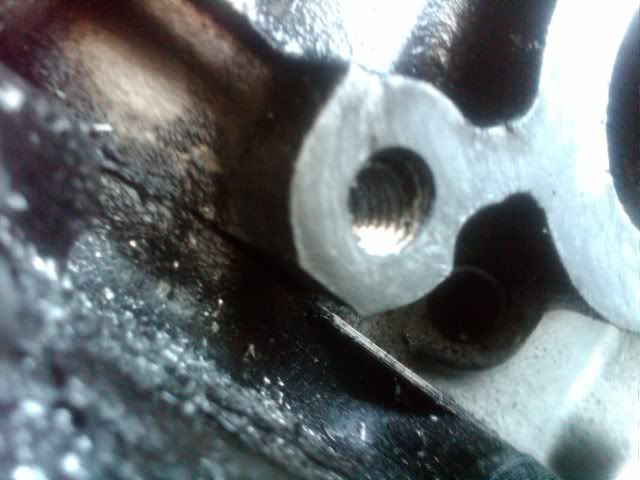
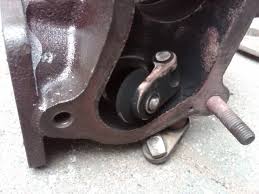
Removing the Broken Stud No.1
I sought advice from all the old boys I could find and the general consensus was if you use a stud extractor you will be LUCKY to get it out. The best way is to Drill and Re-Tap. This is what we did. It is crucial that the first drill is the best you can afford (Tungsten Carbide Tip or similar) We used 3mm TC.
Center Punch 1st. This can be difficult as the Stud may not have broken flat faced. Look at your new stud or the hole next to it for drill depth.
Drill straight down the middle. Take your time with your drill set at its slowest speed. (Get this wrong and you are doomed)
Keep drilling out with various drill sizes to maximum 6.8mm as the Stud diameter is 8mm including thread
Use 8mm Tapered Tap to remove the tail ends of the old Stud threads. Go carefully backwards and forwards cleaning the threads with lubricant as you go.
Make sure everything is clean and reassemble.
Make sure you fit the new Gasket with the Tin Part upwards and the top curling towards you.
4 Points to remember on re-assembly.
1.Make sure you tighten the Manifold to Head Evenly
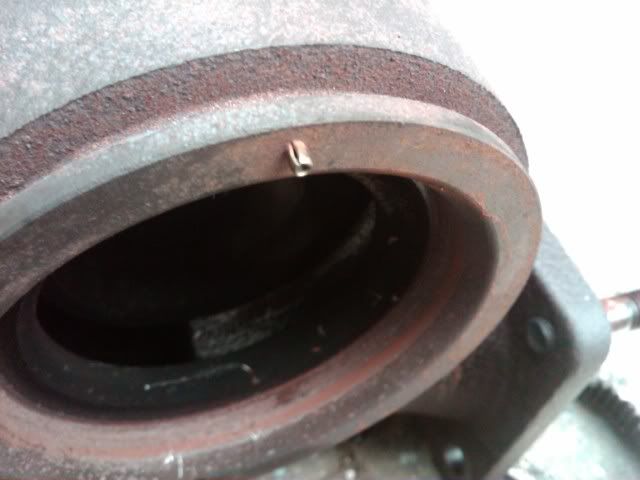
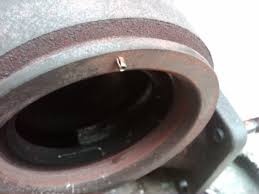
2.Note the soft peg and corresponding hole at the 12 o'clock point (see pics later) in the 2 halves of the Turbo
3.Use Exhaust Assembly Paste to fasten up the EGR pipe to the EGR Valve if this is not blanked off.
4.It was noted that the pipe from the Manifold to the EGR Valve has an OD of 22mm. Can we not blank the EGR Valve off using a standard plumbing copper 22mm blank?
Rebuild using the reverse of the above instructions.
Good Luck.
Broken No.1 stud ( the one just outside the turbo heat shield, nearest the alternator)
Symptoms:
.Black Sooty deposits around the Bleed hose pipe and round front passenger side of head.
.Strange Whistle sounds in time with engine revs, usually mistaken for loose drive belts
.Smell of Exhaust fumes in Cabin
.Nut Missing
Tools Required:
A very well stocked Socket Set
6 sided sockets
Exhaust Assembly Paste
Light Emery Cloths
Penetrating Oil (WD40 etc)
3mm Good Quality Tungsten Carbide drill bit or Similar.
Assorted Drills up to 6.8mm
8mm Tapered Tap and Wrench
Cloths
Suitable Aerosol Can Lid
Parts Required:
Exhaust Manifold Gasket mazda part no. MWL0113460 -approx £20+ Vat
6 Nuts (Hot Side) mazda Part No. M9YB100801 – approx £3.34+ Vat each
Mazda Hot Side Studs were approx £4.50+ Vat each. We fit Landrover V8 Metric 8mm Studs Part no. TE108051L £0.39+ Vat each (Cannot Guarantee, but it has done 500 mile no issues)
Repair:
Remove ALL BATTERY CONNECTIONS,
Remove Heat Shield,
Remove flexible U rubber pipe (Air Inlet to Turbo),
Remove large diameter solid plastic pipe that heads towards the rear of the engine to air filter,
Remove Hatch at the rear of the engine to gain access to the EGR Valve area,
Remove large diameter plastic pipe across back of head, towards Air Filter. Watch the connection with the Rocker Cover Breather and Vacuum pipe,
At this point it is advisable to crack the joint of the Exhaust Manifold to EGR 22mm metal pipe as this can be a pig to undo. Leave for a while pre-soaked with WD40 or similar. We had to use 24inch Stiltsons to remove. It was tight,
Losen this joint, but it cannot be removed until the EGR end of this pipe is unbolted (watch the little Tin Gasket at the EGR end),
Unbolt the Exhaust (watch the ring gasket. It can be reused if cleaned out and refilled with exhaust jointing paste) and the Exhaust to Engine Mounting,
Remove Turbo to Exhaust Casting and Bracket to Body,
Undo Turbo Mounting Bolts (3 go on way 1 goes the other, watch the Tin Gaskets. These can be reused if cleaned up and look ok),
Loosen Oil Fed Pipe, but leave connected to keep dirt out (watch the copper washer),
Undo the Turbo Clamp that holds the two halves of the Turbo together. The rear end of the Turbo can then come away with the manifold without breaking into the cooling system as there is enough flex on these pipes to move things around,
Cover inlet of Turbo to stop Swarf or Dirt getting into turbo (Use and Aerosol Can Lid. Cheers Kirsty),
Unbolt remaining Manifold Nuts,
Remove Manifold from Head,
Examine Gasket, Examine Manifold and Examine Head,
Remove all Studs and Examine carefully, (no.8 on mine was also found to be suspect see pics of gasket and studs later),
Clean up Cylinder Head,
Remove Alternator from mounting. No need to remove wiring as it will move out of the way,
Put manifold on the flattest surface you can find. Shine a light under the Manifold to see if you can see the light at any point. You may find that each end (Studs 1 an 8 ) are raised. (Mine needed 2mm out of the middle area to get right by skimming.) See pics later. Head Skimmed at R.M Parker, Precision Engineering, Special one off Tooling, Unit 2, Riverside Mill, Greenfield Road, Colne, Lancashire, BB8 9PE. Tel: 01282 870230 approx £50.00 (depends if he likes you :@))
Now the Tricky Bit
Removing the Broken Stud No.1
I sought advice from all the old boys I could find and the general consensus was if you use a stud extractor you will be LUCKY to get it out. The best way is to Drill and Re-Tap. This is what we did. It is crucial that the first drill is the best you can afford (Tungsten Carbide Tip or similar) We used 3mm TC.
Center Punch 1st. This can be difficult as the Stud may not have broken flat faced. Look at your new stud or the hole next to it for drill depth.
Drill straight down the middle. Take your time with your drill set at its slowest speed. (Get this wrong and you are doomed)
Keep drilling out with various drill sizes to maximum 6.8mm as the Stud diameter is 8mm including thread
Use 8mm Tapered Tap to remove the tail ends of the old Stud threads. Go carefully backwards and forwards cleaning the threads with lubricant as you go.
Make sure everything is clean and reassemble.
Make sure you fit the new Gasket with the Tin Part upwards and the top curling towards you.
4 Points to remember on re-assembly.
1.Make sure you tighten the Manifold to Head Evenly
2.Note the soft peg and corresponding hole at the 12 o'clock point (see pics later) in the 2 halves of the Turbo
3.Use Exhaust Assembly Paste to fasten up the EGR pipe to the EGR Valve if this is not blanked off.
4.It was noted that the pipe from the Manifold to the EGR Valve has an OD of 22mm. Can we not blank the EGR Valve off using a standard plumbing copper 22mm blank?
Rebuild using the reverse of the above instructions.
Good Luck.