Regarding the Alternative Cat Flap (ACF A.C.F.) process I am putting some photos in a Flickr album that should stay around a time
 https://www.flickr.com/photos/johnbulla ... 7588048502
The photos are a number of snapshots of todays proceedings.....
My experiences of today are as follows.... (I am calling the big bit that hinges up and down, the floor panel, there is a smaller panel that hinges within the larger floor panel, this I would call the catflap.)
****General
Secure the struts and or the flap when moving the floor panel around otherwise a grab or snag might propel the floor panel into the fabric... bum arse!
So have another pair of eyes looking out for you and helping you when maneuvering the floor panel around as I learn to my cost today when I managed to tear a wee hole in the fabric. Helen fixed these with Tenacious Tape!
If the floor panel is NOT secured it can get out of alignment with respect to the fabric and this can (and did) lead to the fabric getting gouged/dragged/ripped by the roof mechanism (of course you have always pulled in the folds of fabric in before the final shut and lock????)
****Tools
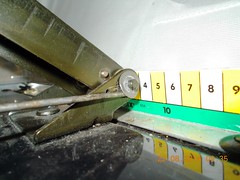
get yourself a thin 12mm spanner to undo the strut bolts retaining nuts, strangely they have 8mm threads whether 12mm or 13mm heads......
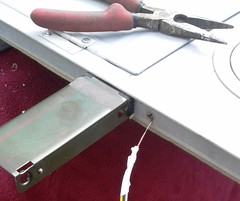
**** The catflap
It is held into the floor panel with pop rivets, drill out their centres on the floor side to release the hinges then countersink the remains of the rivets to ensure there are no sharp bits to rip your nightgown! turn it around place it properly and slowly drill new holes for the hinges, re-secure the hinges with pop rivets
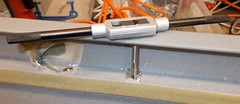
*****The BIG Hinges
The BIG hinges pivot on a long clevis pin held in register by a spring washer, you can get this off using a thin screwdriver to invert it and remove it for re-use. Without the retaining washer the pin can be removed releasing 2 plastic spacer washer each side (I'll probably replace the spring washer with a drilled hole and a P clip}
The hinge assemblies are secured to the floor panel by 13mm headed 8mm threaded bolts with washers
The tilting floor panel is made up of pretty high calibre aluminium section - the new mountings for the hinges will either be pre-existing & hidden under the felt/flock covering or I will drill and tap them 8mm (a tap and die set is around £18 from Machine mart)
*** The Gas Struts
Rotating the floor panel means the distance between the ends of the gas struts will change if the existing mounts are used, to correct this you need to either move the mounting brackets on the vehicle roof panel (secured into the metal of the vehicle) or move the mountings on the tilting floor panel.
The forum describes the use of metal plates fastened to the existing body mounts to provide an offset mounting point for the end of the strut... however being in possession of an 8mm tap (a device for threading drilled holes in metal) and a 6.5mm pilot drill I am thinking that modifying the floor panel is best,
I need to drill a 8mm hole in the aluminium section obscuring the location where the existing captive nuts are fitted, this hole will allow me to drill a 6.5mm pilot hole and to then thread it 8mm for the strut ends. the 8mm hole drilled to allow access for the 8mm tap will then be blanked off with a rubber cap. The body then remains virgo intacto. I had thought about an 8mm captive nut on a panel secured by 2 self tappers BUT this was unnecessarily complicated, the tapped hole won.
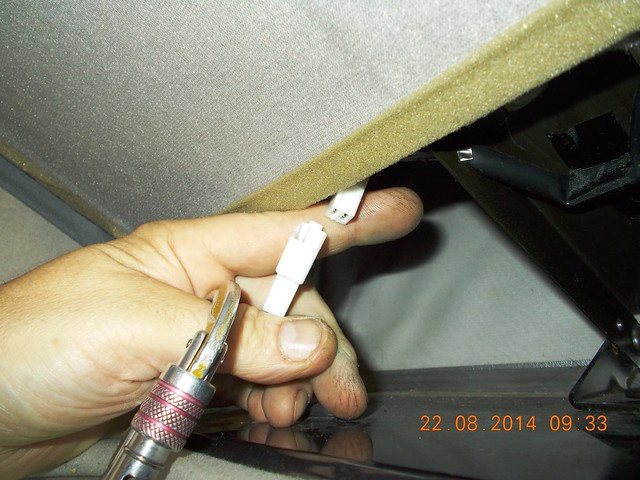
** Tomorrow -Electrics and new M8 threads for the hinges and strut mounts
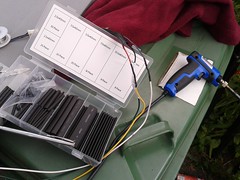
The electrics for the roof light need refitting, I have drilled a hole in the edge of the tilting floor panel to take the longer cable (with a grommet) and intend to pop out the "communication hole" by removing the 4 screws holding it into the frame to allow sight of where the cable to the lights needs routing... dropping it down the turning the panel around by 90 degrees might drop it where I need it!
...the lighting cable is 3 core and easy to source, cutting it at the light end after pulling though the slack gives me a termination for each end.. the connector on the vehicle body is captive .... I may add a duplicated roof release button lower down since we are no fools!
There is a DAB aerial to be installed in the roof but that might be for another day, the Ammeter (Charge Amps to the leisure battery) and Voltmeter (of the same) needs to be replaced with a LCD "charge %" (single gauge) and a 12v cigarette lighter plug socket outlet for the leisure battery is also pushing the aerial install down the list!!!
Helen & Ella are in the New Forest tonight with a hingeless and catflap less Bongo/Freda!