Page 1 of 2
Fuel Gauge Fix
Posted: Tue Aug 11, 2009 7:50 pm
by Trooper
Hi All I'm a newbie to Bongo world and I thought I'd start with a easy one, the fuel gauge doesn't work and after reading the forum, see that the best place to start is the sender unit short the wires out and fix the earth etc only prob is I can see the loom run to the top of the tank but can't see how you get to the sender unit is there a hatch?

Re: Fuel Gauge
Posted: Tue Aug 11, 2009 7:54 pm
by Doone
You're lucky, Kirsty has just posted some photos of the hatch
HERE
Re: Fuel Gauge
Posted: Tue Aug 11, 2009 11:41 pm
by David Edwards
And damn good piccies they are too, wish they were there when I had to do mine, I had to do it "blind" so to speak..but.. I did it so it must be easy.,lol.
Re: Fuel Gauge
Posted: Wed Aug 12, 2009 3:37 am
by patnben
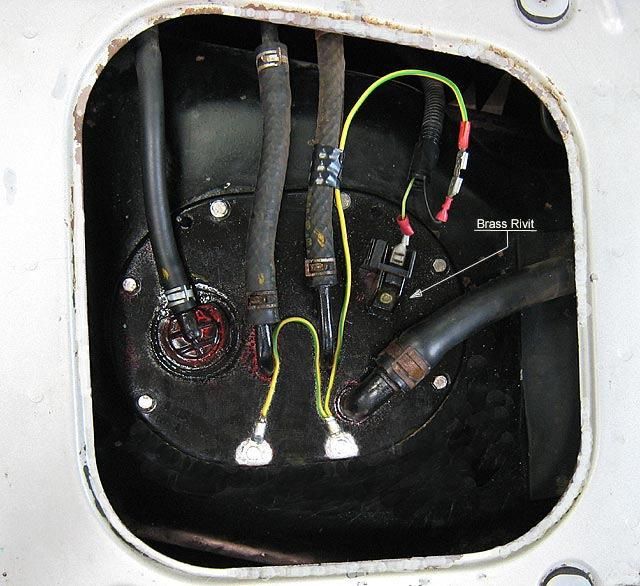
Usually caused by corrosion between the tank connector and top plate.
Cut out the floating connector, connect green wire with spade terminal
to the horizontal tank connector, extend the black ground cable, and
connect directly to top plate. by cleaning 1 or 2 fixing screw areas on
the top plate and connect as shown.
Before doing all this you could try shorting the green and black wires

together, the fuel gauge should gradually move to the full position.
Re: Fuel Gauge
Posted: Wed Aug 12, 2009 6:32 am
by patnben
For a complete test of the fuel gauge wiring you will need a
cheap multimeter with a range of around 2K Ohms.
The tank sender unit is a variable resistor of around 0 - 100 Ohms.
0 Ohms = a full tank and 100 Ohms = an empty tank. You must
be able to estimate the approximate amount of fuel in the tank,
do not fill it to the brim, anything up to three quarters is best.
From memory, I think the sender resistance is linear and you can
calculate an approximate resistance value accordingly. ie. a quarter
tank should measure 75 Ohms and a three quarter full tank should
measure around 25 Ohms.
The positive supply to the sender is via the brass rivit which
fixes the tank connector to the fuel tank top plate.
The ground - or return path - is via the sender support metal
brackets bolted to the underneath of the fuel tank top plate.
Making sure that both measuring points are perfectly clean,
and the ignition is switched off, measure the resistance between
the brass rivit and the fuel tank top plate. If the sender unit is
in good condition then the measured resistance value should
correspond to your estimated value according to the amount
of fuel in the tank. If it continuously measures zero Ohms then
the sender unit is probably at fault, or the tank is full to the brim,
and you need to remove the top plate and test the internal
connections and resistor.
If this test proves the sender is OK, then simply short the two
wires - green and black - together, this simulates a full tank.
Switch the ignition on and the fuel gauge should slowly rise
to the maximum - full tank - position. If it doesn't do this then
you have a problem with the fuel gauge itself or the connections
on the PCB behind the instrument cluster.
If this test proves the fuel gauge and circuits are OK, then the
problem can only be corrosion between the fuel tank top plate
and the main fuel tank connector block.
As the eight securing screws for the top plate are sometimes
rusted away, it's worth replacing these with stainless steel
hexegon head set screws which you can easily tighten or
remove with a hex socket in the future.
Ben.
Re: Fuel Gauge
Posted: Wed Aug 12, 2009 12:50 pm
by Ian
Fact sheet on the way!
Also, new sender units (Mazda originals) are on their way from Japan.
Re: Fuel Gauge
Posted: Thu Aug 13, 2009 8:12 pm
by Trooper
Spot on thanks, fuel gauge works a treat.
Re: Fuel Gauge
Posted: Sun Mar 07, 2010 11:37 am
by karen
thanks
i've actually just been out to look at it again to see and what thickness it was
thinner than i thought
will bite the bullet and just get out and do it
Re: Fuel Gauge
Posted: Tue Apr 06, 2010 12:21 am
by missfixit70
Having just checked mine's all ok before fitting a wooden floor, I thought the fuel hoses were looking a bit ropey, as it says 4 yearly replacement on fuel hoses in the service schedule, decision made to replace the 15 year old ones on the sender. Some 6mm (1/4") & 8mm (5/16") ID fuel hose, original constant pressure clip reused as they were still in good nick, I did the vapour hose (even though it didn't look too bad) as well as the fuel supply & return.
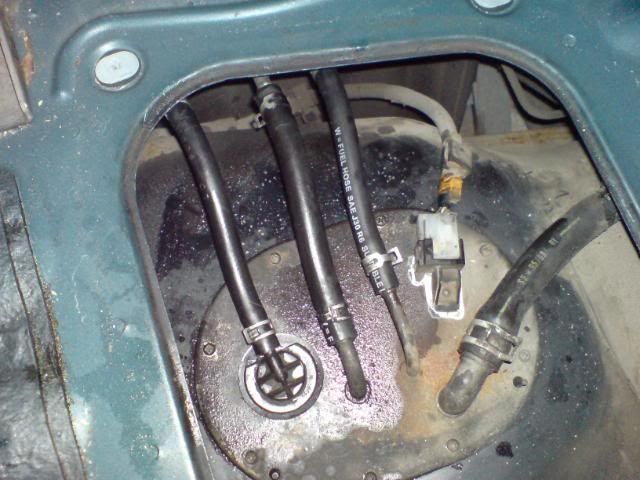
This is how bad the old hoses were inside
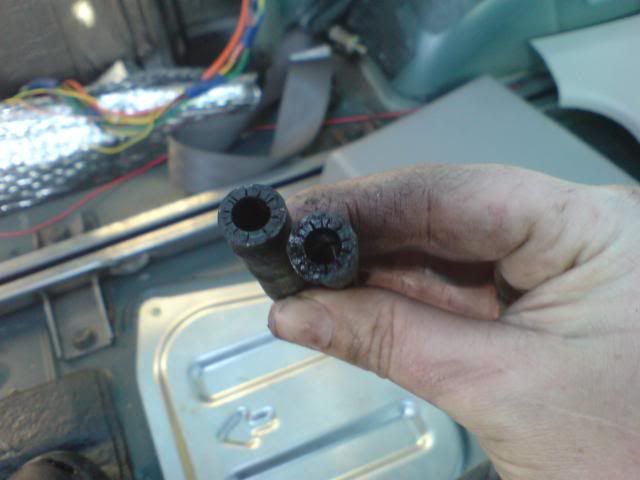
Old hose above new one
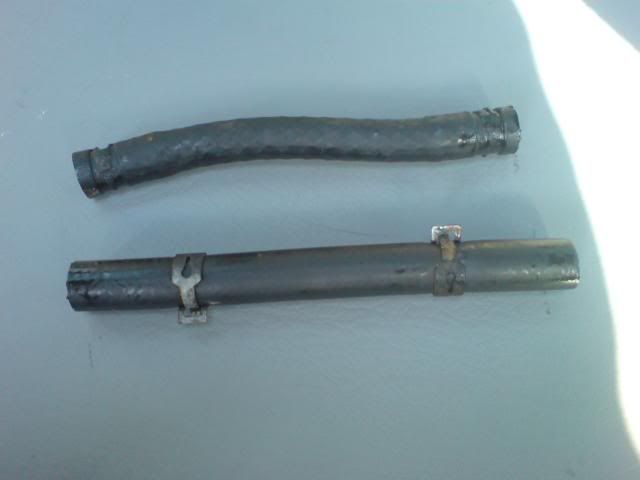
Didn't bother with the larger vent hose, as it's not actually subject to fuel flow (in theory) & I didn't have that size hose

If you're attending to your fuel sender, worth doing the hoses while you're there?
Re: Fuel Gauge
Posted: Tue Apr 06, 2010 10:44 am
by mikeonb4c
Excellent advice as usual Kirsty. Out of interest, where's the best place to purchase fuel tubing from and would you be able to give idiot-proof instructions on what to ask for e.g.:
- how many 6mm (1/4") internal diameter pieces needed and what length
- how many 8mm (5/16") internal diameter needed and what length
I'd like to get some in for when I attend to my fuel sender (which is just begineeing to show signs for needing attention).
Re: Fuel Gauge
Posted: Tue Apr 06, 2010 3:07 pm
by missfixit70
I got mine from my local independent type car shop, but any motor factor etc should be able to supply, I got a 1metre length of each, hoping it'll be enough to do all the hoses under the drivers seat too, I'll keep you posted on that one

but for the sender I think the lengths were approx 150mm (2 x 6mm id & 1 x 8mm id I think) but probably not necessary to do the vapour hose on the left, that was a bit of a pain to do as well, ended up pulling the valve assembly out of the sender plate to get the hose off, then had to take the rubber grommet off the valve, firkle it back in the hole then push the valve back in once the hose is fitted at both ends.
Re: Fuel Gauge
Posted: Tue Apr 06, 2010 8:15 pm
by mikeonb4c
missfixit70 wrote:I got mine from my local independent type car shop, but any motor factor etc should be able to supply, I got a 1metre length of each, hoping it'll be enough to do all the hoses under the drivers seat too, I'll keep you posted on that one

but for the sender I think the lengths were approx 150mm (2 x 6mm id & 1 x 8mm id I think) but probably not necessary to do the vapour hose on the left, that was a bit of a pain to do as well, ended up puuling the valve assembly out of the sender plate to get the hose off, then had to take the rubber grommet off the valve, firkle it back in the hole then push the valve back in once the hose is fitted at both ends.
Thanks Kirsty - now filed for my and others benefit

Re: Fuel Gauge
Posted: Tue Apr 13, 2010 9:34 pm
by karen
my hoses where pretty much the same
the vapour one was ok but i couldnt get it off so had to cut it off
i went to local factor but as soon as i said diesel they said they didnt stock diesil grade and that i was best to go to manufacturer
i have some photo's and dare i say it questions but will try to get these posted tomorrow
Re: Fuel Gauge
Posted: Tue Apr 13, 2010 9:52 pm
by missfixit70
The hose I got was rated suitable for use with unleaded (SAE J30 R6 ), but I checked it out & I'm pretty sure it's ok for diesel too, I think unleaded is harder on fuel hose than diesel, may be wrong of course

Re: Fuel Gauge
Posted: Wed Apr 14, 2010 7:29 pm
by karen
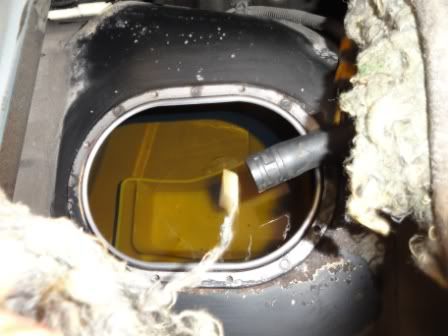
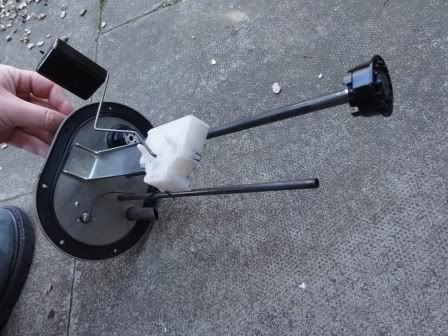
ok quick recap - fuel guage always at empty. done the earth bit and was alwways full.
is the marks on the top enough to have been an issue - have since cleaned up.
on the actual sender - i popped a meter against the positive connector and the connector attached at bottom and it bleeps to indicate a circuit
is there anything else i can check on sender - was hoping it would be more complex or big broken wire


