


Firstly, to access the blinds you need to remove any screws or bolts attaching items through the upper plastic trim pieces; remove all the upper seat belt bolts, all the rear grab handles and the two screws holding on the tailgate light.
Next, starting from the back of the interior remove all the upper plastic trim. You don't have to remove the lower trim panels but you may need to release them to free the upper panels. Be prepared for a game of hunt the flying trim clips as they can fly off and disappear behind the lower trim panels (whenever I take off a panel I always make sure the trim clips are not loose before refitting, it saves another game of hunt the trim clip later when refitting).
Now you have a number of options; either unpeel the blind from the roller in situ as it's only held on with double sided tape, undo the two little screws at the left end of the roller or remove the complete blind, frame and all. I initially tried the second option but found refitting the roller with the spring under tension extremely fiddly so eventually opted to remove the blinds complete. Each blind is held on with four bolts and are a doddle to remove although the side door blind requires a bit of effort to remove as you have to fight against the roof lining to get it out.
With all the frames removed I then disassembled the blinds discreetly labelling each component with the window location (i.e. NSR, OSR, NSF and NSR) and each parts direction to aid reassembly later.
To disassemble, remove the two left screws at the end of the roller - the spring will rapidly unwind when released - then peel the blind off the roller and slide a Stanley blade between the blind and the plastic bottom strip to remove this from the blind. you can then remove the two black screws on the back of the bottom strip and remove any old bits of thread. At this point you can also check whether there is tension in the springs in the bottom rod, necessary to keep the blind down (several of my springs had come loose for which I came up with a mod to correct the problem - tell me if you've had the same problem and I'll explain my solution).
To make the new blinds (and I'm no seamstress) I pinned the old blinds to the new fabric - a thicker black peach feel fabric with good black out but be aware you have limited room with the blind retracted - and cut around with a good long pair of scissors. Cutting doesn't have to be perfect as most edges will be hidden behind the plastic trim.
To reassemble, the double sided tape on the roller may have enough tack but to be sure I used some contact adhesive spray from Toolstation along the full length of the roller. Loosely hang the blind in its frame to check alignment and remove and reattach the blind if necessary. To fix the bottom strip I tacked it in place with some double sided tape and put the blind back in the frame to check alignment again. When I was happy I ran a line of superglue down the length of the double sided tape facing the blind one side at a time and sandwiched it all together.
To refit the rollers I found fourteen clockwise or outward rotations of the rod that comes out of the left side of the blind gave the preferred tension and then carefully reinserted the roller and fixed in the two screws. Check you are happy with the tension and if you are then refit to van, fix plastic trim, the rear light, grab handles and seat belts and you're done.
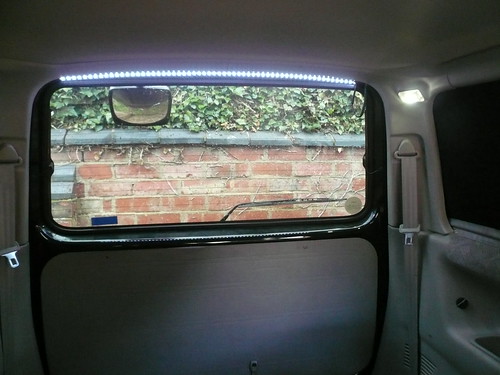
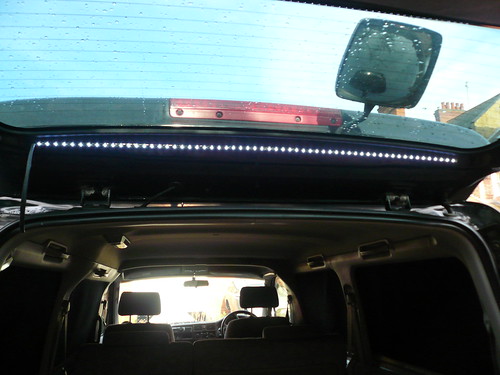
Here's a couple of pics of my finished article;
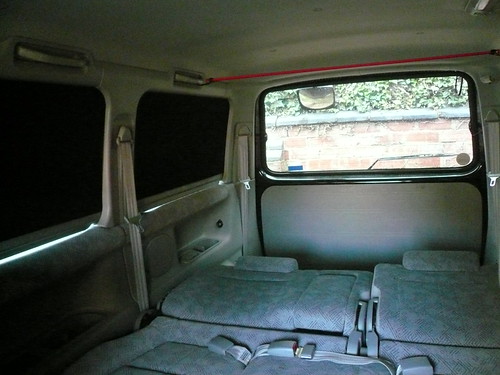
You will note that blackout blinds highlight any areas of light leakage inwards during the day and outwards at night, much of which could be fixed with something like a bit of faux fur attached to the bottom of the blinds. The gaps around the blind on the side door will need another remedy as the gap at the bottom is big and the trailing edge of the blind isn't hidden by the plastic trim.
Note also that I took the opportunity to fit a lower output led strip onto the tailgate and wired into the rear interior light to add to the switched interior light and greater illumination with the tailgate open - a really easy pimp.
I hope this helps someone and would be happy for it to be made it into a factsheet for future reference if nothing similar exists.
